Shared services
Want to share photos without paying for cloud storage? Tired of creating throwaway accounts for free trials? Miss the days when publishing a personal website was easy? With shared services, you can do all of this directly over Jami’s peer-to-peer network.
Shared services are accessed directly over Jami’s peer-to-peer network. No hosting provider, cloud storage account, or public IP configuration is required.
Tip
More information on the shared services feature can be found in this blog post!
Accessing your contacts’ services
Note
The  button appears whenever the selected contact has one or more shared services available.
Shared services are available only while the person sharing them is online.
To access a contact’s shared services:
Select one of your contacts.
Select the
button next to the Call button.A list of your contact’s shared services will appear. Select the service you want to access.
Note
Why don’t I see the button?
Your contact is probably not sharing any services with you.
Desktop
If the shared service is web-based, Jami opens it in your default web browser. For other services, a link to the service is copied to your clipboard.

Android
If the shared service is web-based, Jami opens it in your default web browser. For other services, a link to the service is copied to your clipboard.

iOS
Jami opens the shared service in an integrated web browser within Jami.
Note
The button differs slightly from the one used on the desktop and Android versions.
Important
Custom (non-web) shared services are not supported on iOS and iPadOS due to operating system restrictions.

Creating a shared service
Note
Creating shared services is currently supported only on desktop.
To create a shared service, open Settings → Account → Shared Services.
Directory sharing
The  Add Website option can also be used to share a directory of files. If the selected directory does not contain an
 index.html file, Jami automatically presents a directory listing.
On the Shared Services page, select Add Website.
Website sharing
Note
Only proceed with the following if you feel comfortable with basic HTML and CSS.
On the Shared Services page, select Add Website, then select the directory you want to share. The directory must contain an index.html file in its root directory. You can also include additional HTML, CSS, JavaScript, images, and other assets required by your website.
Note
If the shared directory contains an index.html file, Jami serves it as the website’s home page. Other files remain accessible through links within the site.
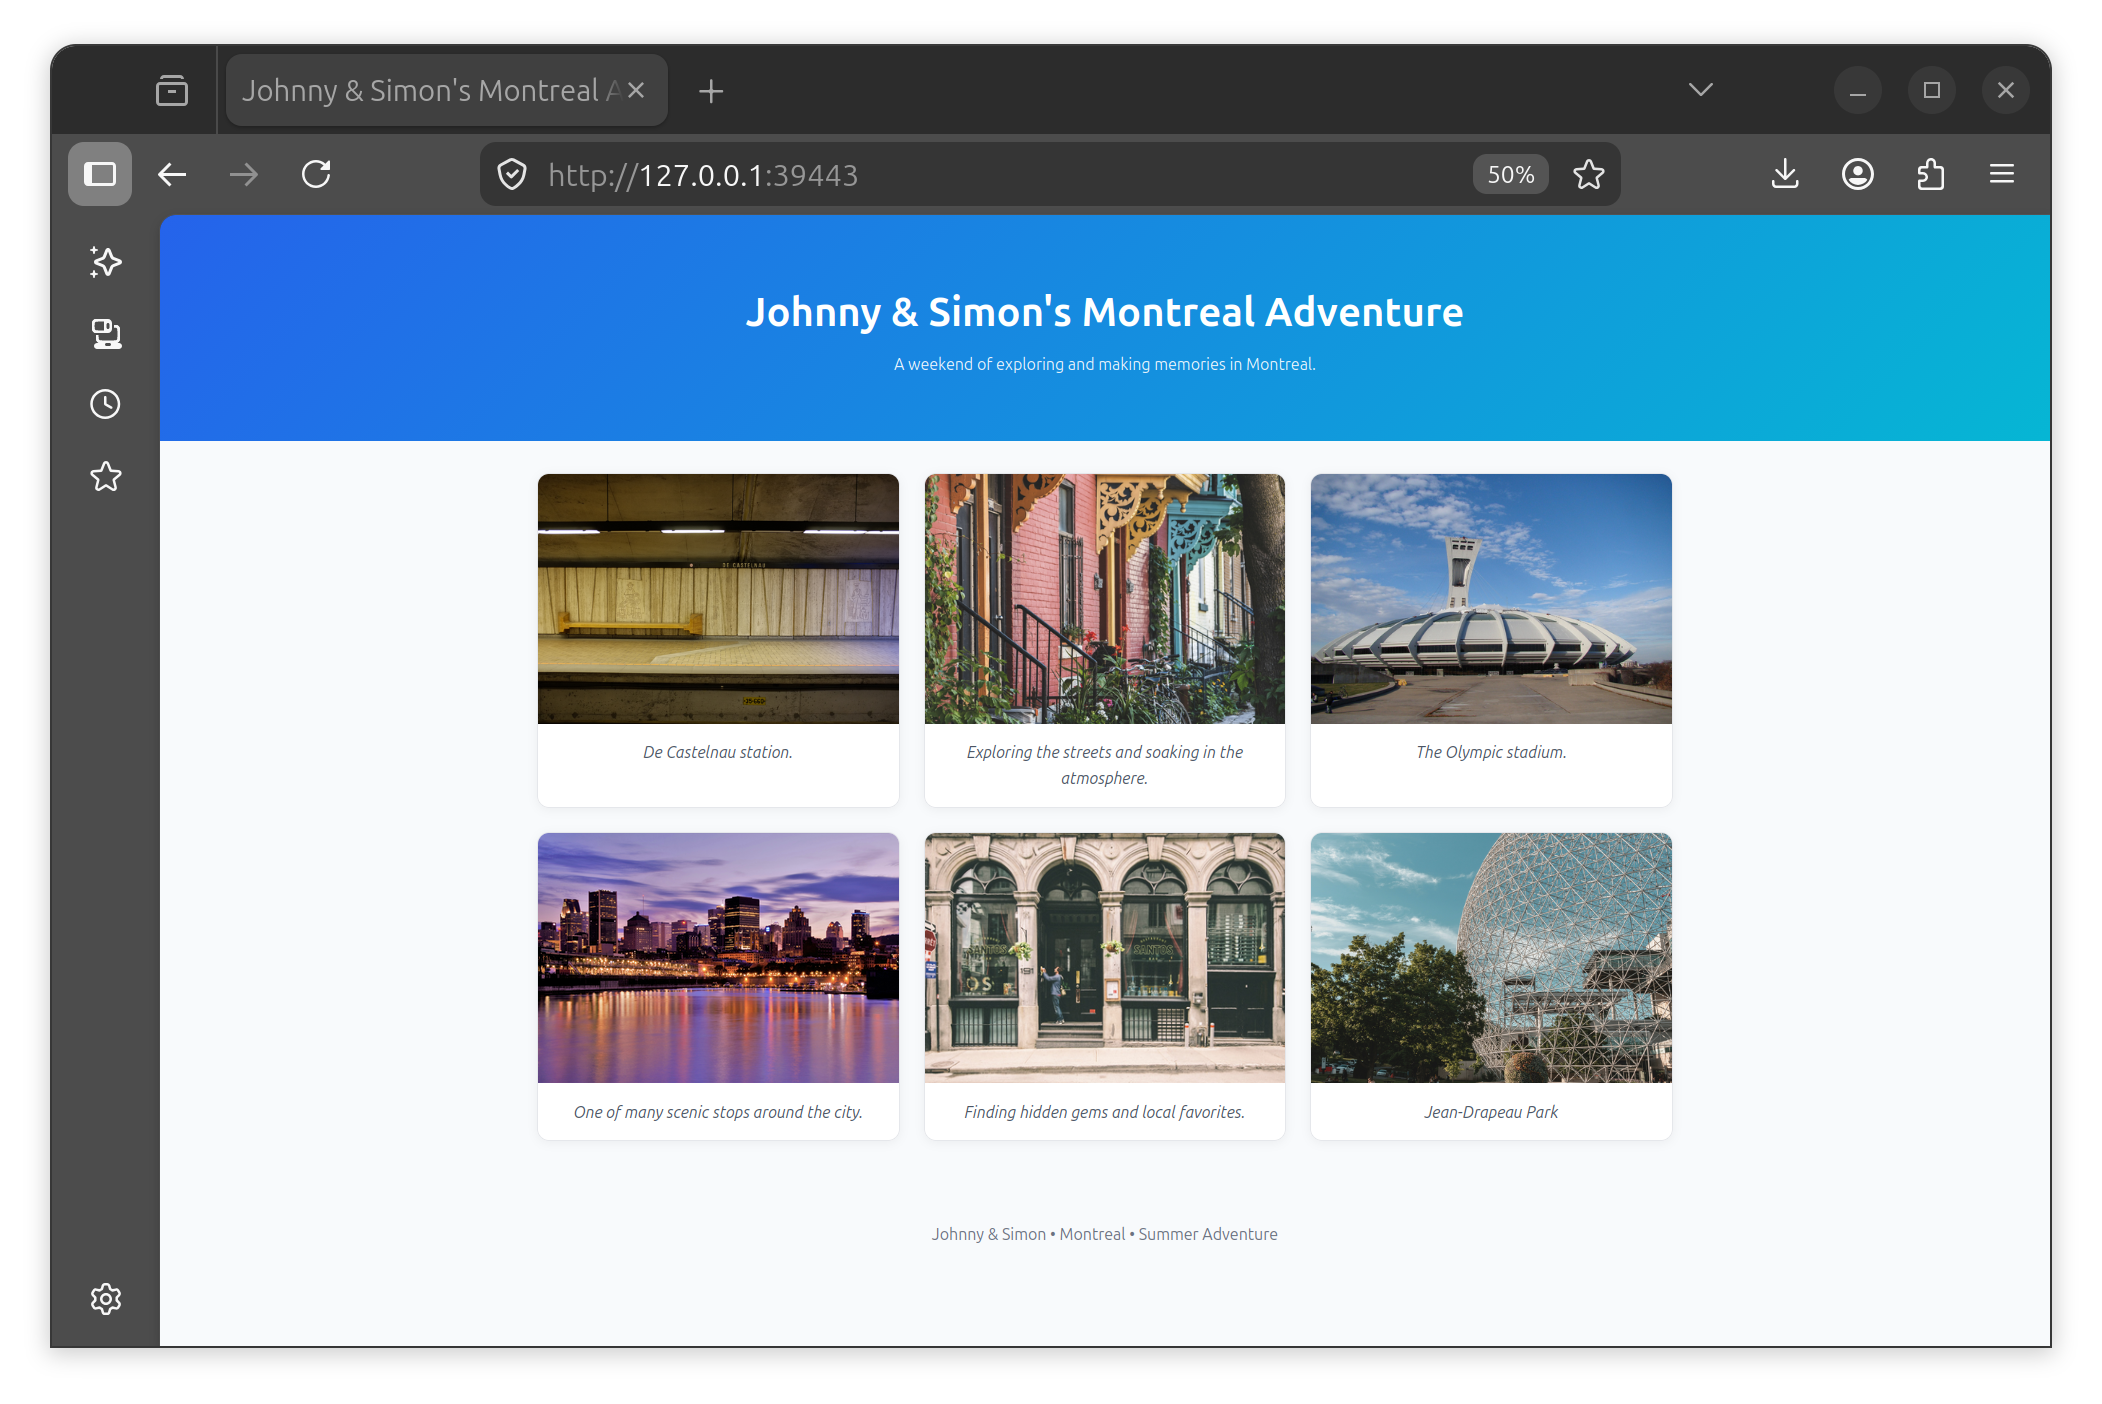
Your contacts will be able to access your website as described above. The following is an example of a customized website.
Limiting visibility
You can control who can discover and access each shared service. Jami allows you to choose from the following visibility options when sharing a service.
Contacts: The default visibility. Any approved contact can access the service.
Anyone (public): Any Jami user can discover and access the service, even if they are not one of your contacts.
Specific contacts only: Only the contacts you select from your contact list can see the service.
You can configure the visibility of a shared service in the configuration dialog as shown below. Set the Accessible option to one of the visibility options above. If you select Specific contacts only, you will then need to add or remove contacts using the chips in the dialog.
Custom service sharing
Jami allows you to share any TCP service with your contacts, not just websites.
On the Shared Services page, select  Custom service and configure it as needed.
Sharing a Minecraft server
For this example, we will host and share a Minecraft server with a contact.
Detailed Setup Instructions
Create a dedicated folder on your machine for your Minecraft server. In this example, we will name the folder
MC Server.Download the official Minecraft server (
server.jar) from the Minecraft website and move it to theMC Serverfolder.Ensure Java is installed before running the
server.jarfile. On Windows, double-click theserver.jarfile. On Linux and macOS, run the following command in the directory that contains theserver.jarfile:java -Xmx4G -Xms4G -jar server.jar noguiAfter running the
server.jarfile, theMC Serverfolder will contain additional files. You need to modify two of these files: a.eula.txt: Seteula=truein this file after reading and agreeing to the EULA. b.server.properties: Use this file to configure your Minecraft server as required. Check the following property:Set the
server-portvalue. You can usually leave this at the default value of25565provided that it’s not already in use.
Save the changes and restart the server using the same method as in Step 3. The server is ready when the console displays the
Donemessage.Add a custom service to Jami. Ensure the
Local portfield matches the value you set forserver-port. As with shared directories and websites, you can control access to the service. After configuring the service, select the Save button.
Before inviting others, verify that you can connect to the Minecraft server yourself. Inside Minecraft, navigate to Multiplayer → Direct Connection and enter
server-ip-address:server-portin the Server Address field, then select the Connect button. If everything is working correctly, you should successfully join the server and see the following message in the server log:USERNAME joined the game.Once you’ve confirmed the server is working correctly, invite your contacts to join.
Your contact opens your shared services list and selects your shared Minecraft server.
The server address is copied to their clipboard automatically.
They paste the address into the
Server Addressfield in Minecraft and select Join Server.
Limitations
Shared services are only available while the host is online.
Creating shared services currently requires the desktop application.
iOS and iPadOS support only web-based shared services.
Only TCP services are supported; UDP services are not currently supported.
Performance depends on the host’s internet connection and available bandwidth.
Advantages
No domain name registration required.
No cloud storage fees.
Does not require Internet connectivity when peers can reach each other over the same network.